Wednesday, January 23, 2013

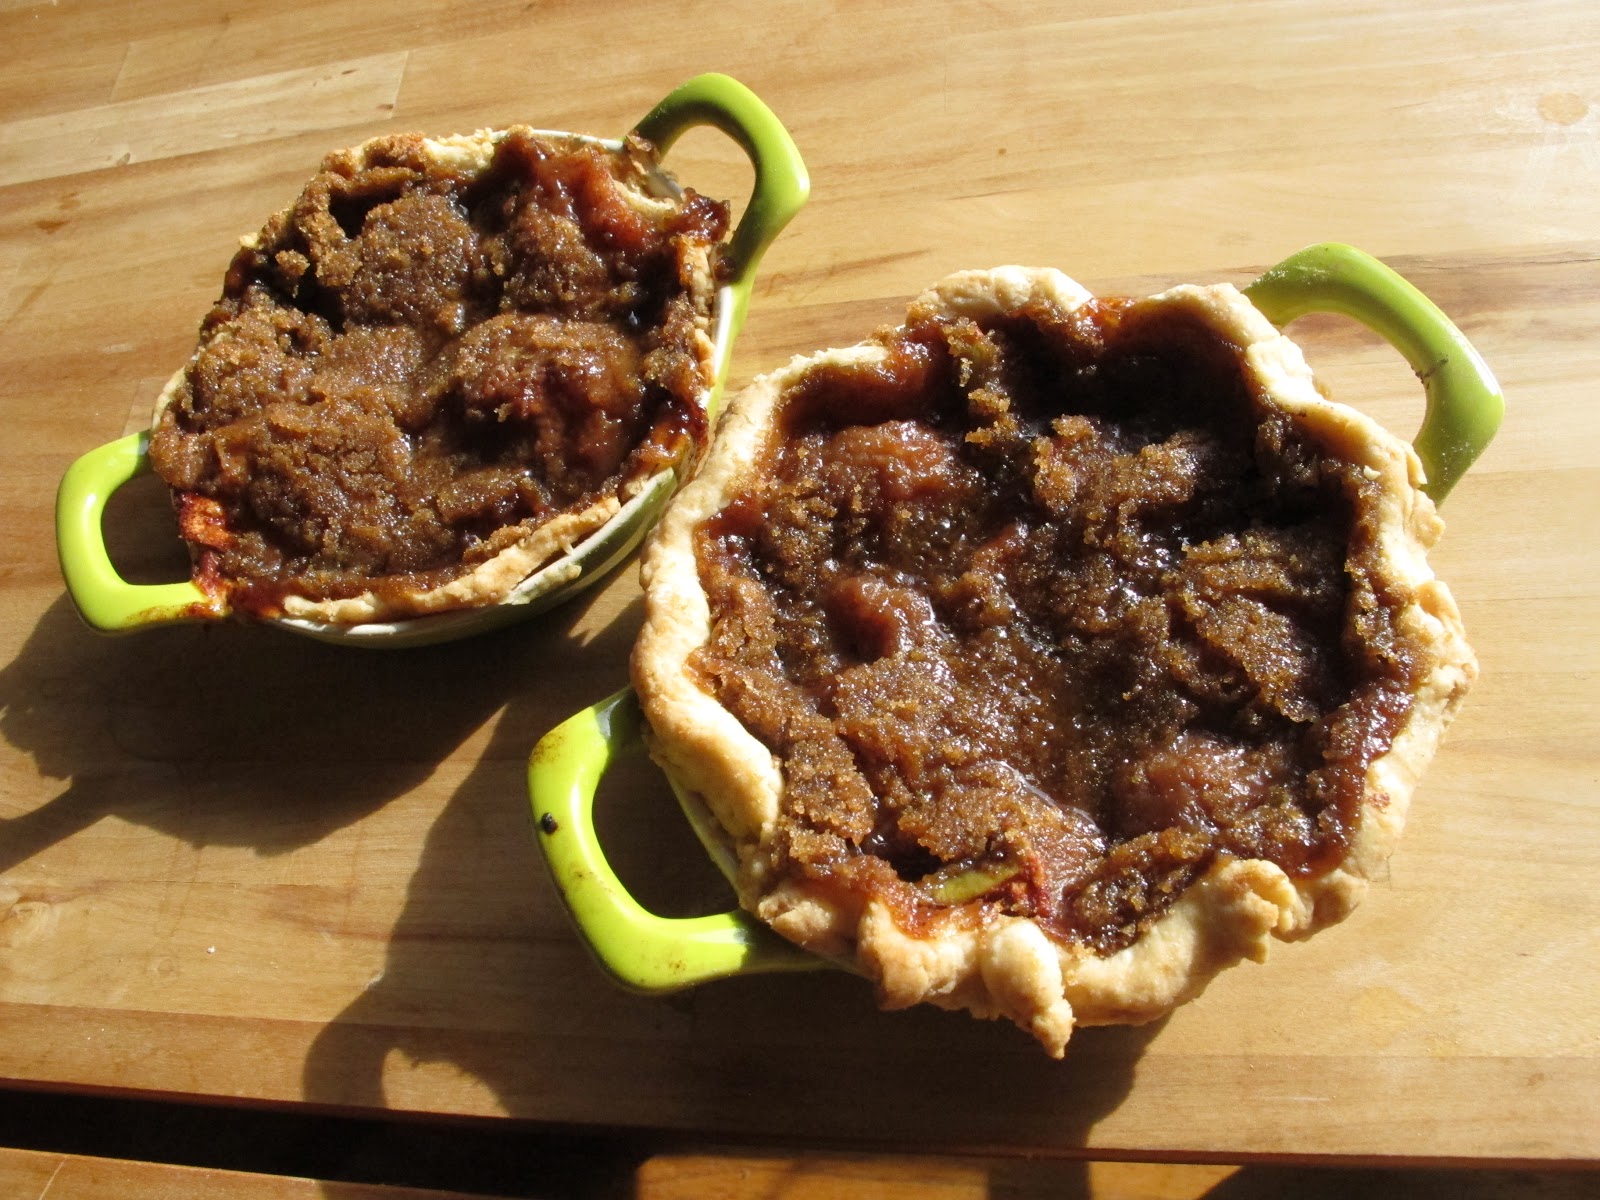
Tart Tatin with Cranberries and Maple Syrup

The first time I had Tart Tatin, was at dinner with Bob and Denis, 20 odd years ago.  Bob, who had just returned from a year long sabbatical in France, made a classic Tart Tatin and I loved it.  Bob told me the story about how Tart Tatin was named after the Tatin sisters, who while caramelizing some apples in a frying pan left them unattended, resulting in overdone apples.  Needing to have a desert to serve for lunch at the family restaurant, they rescued the apples by putting a pastry lid on the frying pan and baked it in the oven. The sisters turned the pan upside down onto a plate, and we now enjoy this classic.  I have taken a few liberties and I am guessing that considering the tart's accidental origin, it is perfectly fine to experiment with the recipe.


Tart Tatin with Maple Syrup and Cranberries
I have a number of maple trees in the country and every year make enough maple syrup for my friends and family.  It also means I can use maple syrup instead of sugar.  Maple syrup is fabulous with apples, and, cranberries add a counter balance to the sweetness of the maple syrup.  I like to use a short crust for the pastry on top, but have been known to use frozen puff pastry in a pinch.


  • 2 tablespoons of butter
  • 1/4 cup of maple syrup
  • 1/4 cup of fresh cranberries
  • 3 crisp apples, such as cortland or graney smith, peeled, quartered and cored, then each quarter sectioned into thirds
  • pastry (see pastry recipe for lemon tart) or use frozen puff pastry

In a cast iron frying pan, melt butter and maple syrup.  Add cranberries and cook until the berries begin to pop.  Arrange the sliced apples and cook on stove top until the apples begin to caramelize.  Cover with pastry, trim and bake in oven at 425F until golden.  Take out of oven, and flip onto plate before cool.  

 Whipped cream or ice cream complete the desert.  

Tuesday, January 8, 2013

Pork Tenderloin Two Ways Over an Open Fire

My sister MJ visited this fall and brought beautiful pork tenderloin for  Saturday's dinner.  We were having difficulty deciding on whether to make the tenderloin with oranges and brown sugar, or wrap then in prosciutto, and so MJ suggested making the tenderloin two ways. 

MJ built a spectacular fire using a traditional log cabin setup and started it with only one match inspite of my wood being wet from a week of rain. Very impressive.  
Pork Tenderloin Two Ways                                           photo by MJ

Fire Roasted Pork Tenderloin with Oranges and Brown Sugar Crust  

  • 1 pork tenderloin
  • 1 organic orange
  • 1/2 cup of brown sugar
  • fresh thyme
  • salt and pepper 
  • olive oil
  • 1/4 cup of white wine
Build fire about an hour before you plan to cook the meat to allow for a good bed of coals.  Place heavy cast iron griddle over fire and heat. Lightly olive oil the grill.   
Cut orange in quarters  and squeeze out juice.  Place  orange quarters in stainless steel pot with wine and 4 or 5 pepper corns and a dash of olive oil.  Top up with water. Boil for 20 minutes and let cool in liquid.  Remove from liquid and scrape off all of the white pith. Tear each quarter into two or three pieces. Remove membrane and fat from tenderloin. Pat dry. Sprinkle with thyme leaves. Arrange the orange skin pieces on the top of the tenderloin, then cover with the brown sugar and pat into the surface.  

Place on griddle and cook for 5 to 10 minutes on each side depending on thickness of the tenderloin.  Brush with olive oil.  Take off grill and let rest before cutting.  

Fire Roasted Pork Tenderloin with Sage in Prosciutto Wrap

  • 1 pork tenderloin
  • 5 or 6 thin slices of prosciutto
  • good dijon mustard
  • 6 fresh age leaves
  • olive oil
  • salt
Build fire about an hour before you plan to cook to allow for a good bed of coals.  

Salt tenderloin lightly, and then cover with a thin coat of mustard.  Arrange the sage leaves over the mustard and then wrap the tenderloin with the prosciutto. Brush lightly with olive oil. 

Brush olive oil on the griddle.  Place tenderloin on grill and cook for 5 to 10 minutes and flip over. Lightly brush with olive oil. Cook another 5 to 10 minutes depending on size of tenderloin. Take off grill and let rest. Cut and serve.  


Thursday, January 3, 2013

A Variation on Tortilla Soup


I used to travel to Mexico City on business , and whenever possible, stayed at the Camino Real, a fabulous hotel built for the Mexican Olympics that combines Mexican heritage with a modern aesthetic.  My favourite thing to order from room service at the end of a long day was their Tortilla Soup.  This meal in a bowl was smokey and fresh at the same time, with just a touch of heat.  This is inspired by my memories of their Tortilla Soup.   

Tortilla Soup with Chicken
  • 1 small dried chipolte pepper
  • olive oil
  • 2 large chopped  yellow onions
  • 2 cloves of finely chopped garlic
  • 1 tablespoon of ground cumin
  • a handful of fresh oregano leaves
  • 2 sprigs of thyme
  • 1 dried lime leaf
  • 1 28 oz can of whole stewed tomatoes
  • salish salt
  • freshly ground pepper
  • juice from 1 lime
  • 6 cups of chicken stock
  • 1 roasted chicken
  • 1 coarsely chopped avocado
  • fresh cilantro, chopped 
  • tortilla chips

You may want to wear rubber gloves and be sure to keep your hands away from your face when working with the pepper.  Start by soaking the chipolte pepper in boiling water and leave until soft, maybe 20 minutes.  Drain and pat dry.  Cut  the softened pepper in half and clean out the seeds and discard.  Chop the pepper into smallish bits and set a side.  

Meanwhile, in a large cast iron pot, heat some olive oil.  Add onions and cook until translucent.  Add garlic and cook for another minute or so then add the chopped peppers, and cumin.  Stir, and add the tomatoes and chicken stock.  Add oregano and thyme and dried lime leaf.  Bring mixture to a boil and turn heat down.  Simmer for 15 minutes.  Remove lime leaf, and purée the mixture with an immersion blender or food processor. Add lime juice and taste. Add salt and pepper as needed.  

I have served the soup immediately and also left it on a very low heat simmering for up to an hour.  I prefer it left simmering for at least 30 minutes.  It give all of the flavours a chance to meld.  

To serve, I put the soup in the bowl, place a big chunk of warm roasted chicken in the bowl and then add chunks of avocado and coarsely broken tortilla chips and some chopped cilantro.

Traditionally, this is served with smaller pieces of chicken and small chunks of fresh Mexican cheese, avocado and tortilla chips on the side to allow for individual garnishing to individual taste.  

Tuesday, January 1, 2013

Last Minute Chocolate Orange Mousse


My neighbours were coming for dinner and I had forgotten to make desert.  This desert is great fall back because it is fast, and being a chocoholic, I usually have good chocolate in the cupboard.  In this case, I had a fabulous dark chocolate with orange bar, and some  very fresh ginger snaps from a local baker at the market.  

Chocolate Orange Mousse with Peter's Ginger Cookie
  • 8 ounces of good quality dark chocolate with orange 
  • 2 very fresh free range eggs
  • 1 tablespoon of orange liqueur
  • 2/3 cup of milk
  • 2 tablespoons of sugar
  • ginger snaps

Chop chocolate into small pieces and place in small food processor.  Add the eggs and the orange liqueur.  Put milk and sugar in small saucepan and heat to almost a boil.  Immediately, pour the hot milk mixture into the food processor and blend for a couple of minutes until mixture is smooth.  Spoon into little cups and chill for at least an hour.  Top with half a cookie and serve.

Note:  This recipe works equally well with plain dark chocolate and brandy, , or a dark chocolate with espresso beans and a coffee flavoured liqueur, and topped with berries and or a dollop of cream.  

Saturday, December 29, 2012

Claire's Risotto with Wild Mushrooms, Sun Dried Tomatoes and Rocket

Claire loves risotto and excels at making it as well, so when her friends came for dinner before going out for a night on the town, she made a fabulous pot of things we had picked up at markets on our holidays.  There were dried wild mushrooms and sun dried tomatoes from the Flower Market in Nice, a bottle of Terret-Chardoney we had purchased at our favourite wine store in Nice, and Parmesan Reggiano from our day trip to Italy.  On the way home from the Tate Modern, we made a small detour and picked up the rest of the ingredients including some rocket from Bourogh Market.


Claire's Risotto with Wild Mushrooms, Sun Dried Tomatoes and Rocket


  • 2 tablespoons of olive oil
  • 1 shallot
  • 500 grams of arborio rice
  • 2 cups of white wine
  • 3 cups of chicken broth
  • 1 cup of dried wild mushrooms
  • 1/2 cup of semi-sun dried tomatoes coarsely cut
  • rocket (arugula)
  • 1 1/2 cups of grated Parmesan Reggiano
  • 2 tablespoons of butter
  • salt and pepper
Soak dried mushrooms in 2 cups of hot water for an hour.  Coarsely dice shallot.  In a large heavy sauce pan, put 2 tablespoons of olive oil, and heat on stove top,  add shallots and cook until translucent.  Add rice and stir, cooking until the rice has a translucent shell.  Over medium heat, add half of the wine and stir until the the wine is absorbed.  Add the remainder of the wine and stir again until absorbed.  Drain liquid from mushrooms, strain and set aside.  Add mushroom broth to rice mixture and stir until absorbed. Add chicken broth 1/2 cup at time stirring until absorbed and repeating until the rice is cooked el denté.  Stir in mushrooms, tomatoes and cheese.  Add rocket and stir again.  Taste, adjust salt and pepper.  Add a chunk of butter, stir and serve.

Friday, December 28, 2012

Pears Poached in Spiced Red Wine

We are in Nice over the holidays, and our friends Ruth and Mark invited us to Christmas dinner with their family.  In Nice, there is a tradition of finishing the Christmas meal with 13 deserts.  The deserts represent the 12 apostles and Christ and are left out, buffet style, to be consumed over the next three days.  We made Poached Pears in Spiced Red Wine and Claire's Tart Lemon Tart (earlier blog) as two of the thirteen deserts.
Pears Poached in Spiced Red Wine
Because we were staying in a short term rental apartment, we only had basic staples such as salt, pepper and sugar.  This provided a guilt free excuse to visit the market one more time to shop for spices as well as pears and lemons.   

There are two great markets in Nice, the Flower Market on Cours Saleya in the old town and the much larger market in Libération.  We went to the Flower Market, which is much more than just flowers with great selections of herbs and spices, as well as fruits and vegetables, and were fortunate to find Secs de Saint Martin Pears.  These are smallish, very firm pears that are perfect for poaching.  


Poached Pears in Spiced Red Wine

  • 1 bottle of Cote de Rhône red wine
  • 1 1/2 cup of water
  • 10 Secs de Saint Martin pears, or other firm small pear
  • 8 peppercorns
  • 4 cloves
  • 1 cinnamon stick
  • juice of one lemon
  • 3 strips of lemon peel
  • 1/2 cup of unprocessed cane sugar
Choose a stainless steel pan that is deeper than the pears and large enough that the pears do not touch each other.  Add wine, lemon juice and water, sugar and lemon peel, and mix.  Add spices and bring the mixture to a boil, then reduce heat to a simmer.  

Meanwhile, peel pears with a small sharp knife and remove the core of the pears from the bottom being careful to leave the stem in place.  Cut a slice off the bottom of each pear to allow it to stand upright.

Place the pears in the spiced wine mixture and slowly simmer for for an hour or until the pears are soft. The slower the poaching process, the deeper and richer the red colour and flavour of the pears.  When the pears are done, remove the pears from the poaching broth, and strain the liquid.  Return the liquid to the pot and gently boil to reduce liquid by about 75% or until slightly syrupy.

I prefer serving the pears at room temperature with a bit of the syrup, however my daughter loves them warm, with a big spoonful of whipped cream melting over the top and we have been know to eat leftovers cold for breakfast the next morning. 

Sunday, December 9, 2012

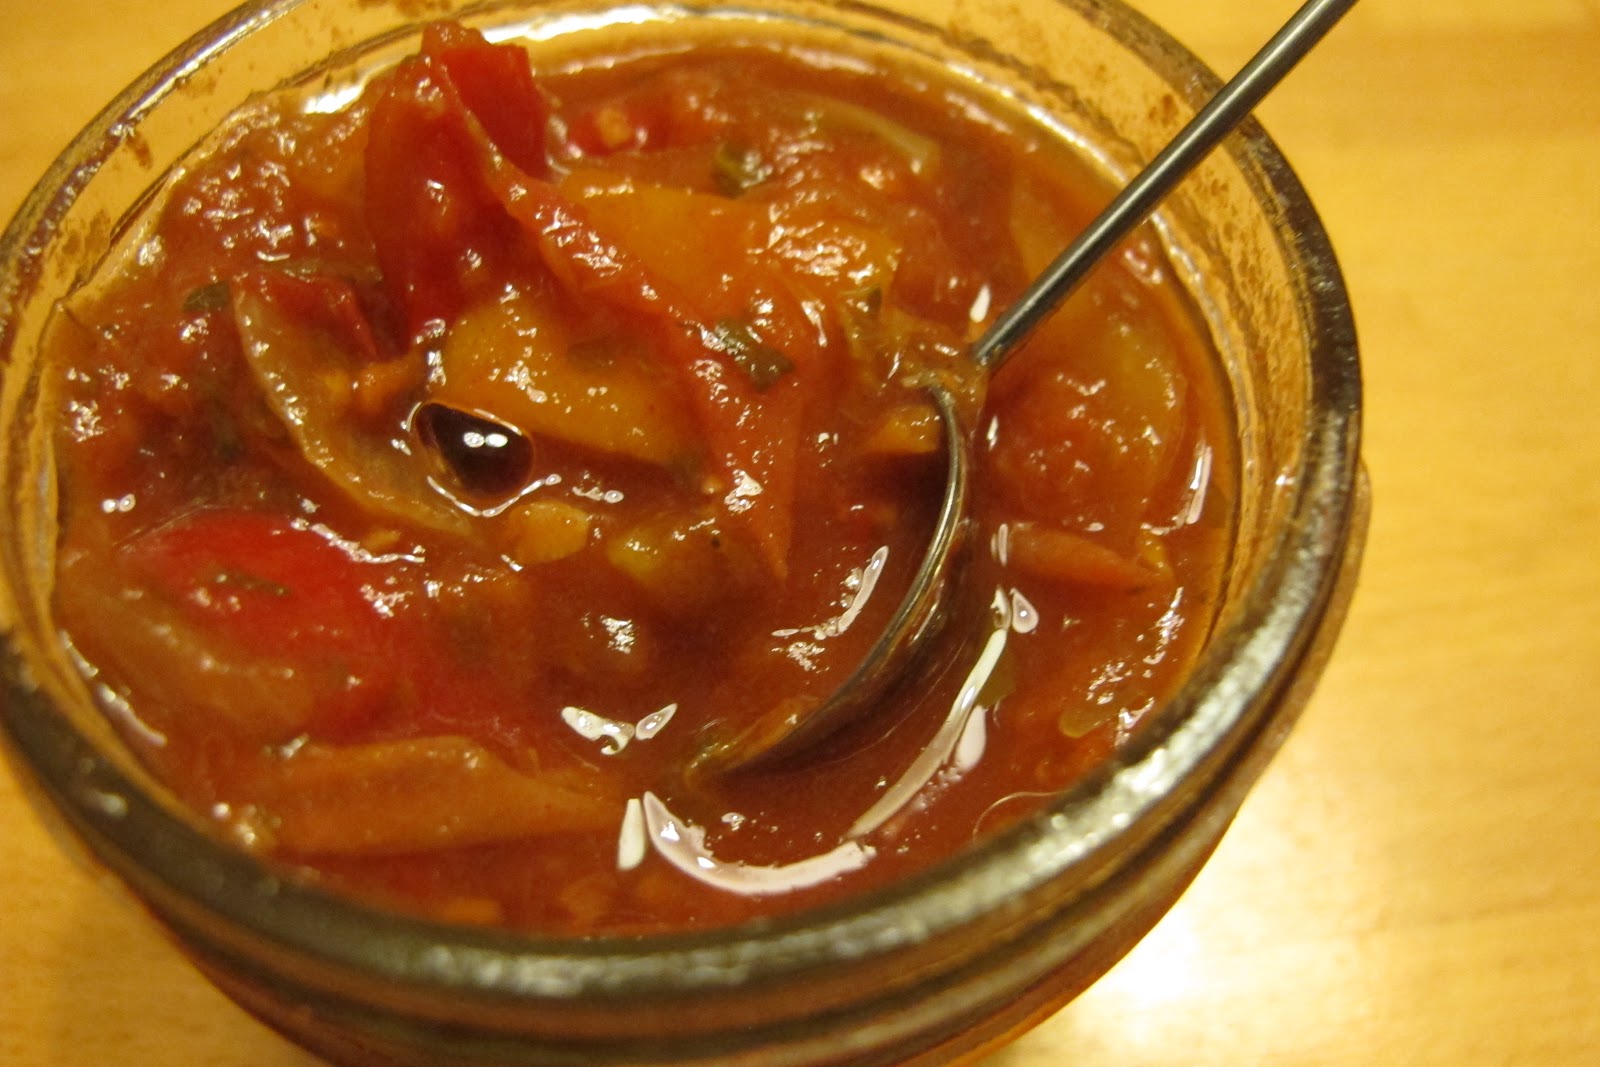
Red-Hot Salsa

Red -Hot Salsa

This fall, I had a bounty of tomatoes and peppers as the first frost approached. I made three different types of salsas with the tomatoes and peppers, and I have finally tasted the Red-Hot Salsa this weekend. After a couple of months of mellowing, this year's, Red-Hot is particularly good I think, because it was a very hot and sunny summer, resulting in fabulous tomatoes and peppers.  I used a combination of the brandywine, beefsteak and plum tomatoes, with the scotch bonnet, chili, and jalapeño hot peppers, that I grew in my garden this summer.   


Brandywine Tomato on the Vine

  • 6 cups of chopped red tomatoes
  • 4 cups of a selection of red, orange and yellow sweet peppers, chopped
  • 2 cups of chopped onions
  • 4 cloves of minced garlic
  • 2 cups of cider vinegar
  • 1/2 cup of finely chopped hot peppers with the seeds removed (be sure to wear rubber gloves and keep hands away from face)
  • 1/4 cup of sugar
  • 1 tablespoon of salt
  • 2 tablespoons of  Spanish hot smokey paprika
  • 3 tablespoon of chopped  fresh oregano
  • 1/4 cup of chopped fresh flat leafed parsley


Put all of the ingredients, except the parsley, into a large heavy enamelled or stainless steel pot.  Bring to a boil, stirring often.  Reduce  the heat and simmer for about an hour, stirring often.  When the salsa is thick enough, a tablespoon of the salsa dropped on a cold plate will flow slowly when tilted. Stir in the parsley and simmer for 5 minutes, stirring occasionally. 

Place the salsa in preserving bottles, remove air bubbles, screw lids on tightly and process  1 cup jars for 15 minutes, and 20 minutes for 2 cup jars.  This makes about 8 cups of salsa.  

If you can wait, the salsa tastes better after it has had a chance to mellow for a month or two. 

Thursday, November 15, 2012

Cauliflower Chicken Curry

In the fall there are big beautiful heads of cauliflower in the markets and stores and I am always in awe of their perfection.  Every year I try to grow cauliflower in my garden and every year I fail.  This year one of my plants produced maybe twelve flowerettes in total and they were a sickly pink colour, so once again I bought one of those beautiful heads from the market.  

One of may favourite things to make as the first cold days of fall hit, is this curried cauliflower with chicken.
Cauliflower Chicken Curry
  • 1 head of cauliflower cut into large flowerettes
  • 1 chicken
  • 1 large can of stewed whole tomatoes
  • 2 large onion, coarsley chopped
  • 1 inch of fresh ginger, finely chopped 
  • 3 cloves of garlic, finely chopped
  • 1 tsp of coriander power
  •  1 tsp of turmeric
  • 1/2 tsp of cumin powder
  • 1 1/2 tsp of garam masala
  • 1 dried chili pepper, seeds removed
  • olive oil
  • 1 can of coconut milk
  • salt and pepper to taste
Cut chicken into pieces, salt and pepper and then brown in a large heavy pan.   Remove chicken and set aside.  Add coriander, turmeric, cumin, cayenne pepper, and garam masala to pan and heat. Add the onion and garlic, and olive oil and sauté. Add tomatoes and stir to loosen bits on bottom of pan. Add browned chicken, cauliflower and ginger. Bring to boil, turn down heat, cover and simmer for 1/2 hour, or until chicken is done.  Remove lid, and skim off any excess fat.  Add coconut milk and taste. Adjust for salt. Garnish with chopped cilantro and serve.  


Wednesday, November 14, 2012

Macaroni and Cheese, Not

This was a favourite of my daughter's as she was growing up and she has recently asked me to share the recipe.  
My version of Mac'n Cheese
Although we always referred to it as macaroni and cheese, I would use over sized pasta shells or rigatoni, because I liked the way the larger pieces of pasta would hold the sauce, and then add things like mushrooms and onions and garlic. I once made the mistake of serving this to some of my daughter's friends when she was quiet young and was informed by a precocious eight year old, that this was NOT macaroni and cheese.  My mistake. 


Mushroom and Onion Mixture in cast iron pan
  • 1 onion finely chopped
  • 2 cloves of garlic, finely chopped
  • olive oil
  • 1 sprig of fresh thyme
  • 1 bay leaf
  • 1 cup of mushrooms, sliced
  • 2 tablespoons butter, 
  • 2 tablespoons flour
  • a pinch of paprika
  • 1 cup of milk
  • 2 cups of large shell pasta, or rigatoni
  • 1/4 cup grated parmesan cheese
  • 3/4 of a a cup of grated mozzarella cheese
  • 1/4 of a cup grated cheddar cheese
  • salt and pepper to taste
Boil water, and add salt to the water, and add pasta and boil until al dente. Drain and set aside.  While the pasta is boiling, sauté the chopped onions and garlic in the olive oil in a frying pan until soft.  Add sliced mushrooms and thyme, minus stem, and sauté until soft. Add freshly ground pepper and add mushroom mixture to cooked pasta. 

In a pot, heat milk with an onion and bay leaf, but do not let come to boil.  Set aside.  Melt butter, slowly add flour while stirring and let start to turn brown.   Add a little of the warm milk while stirring until the mixture is smooth.  Gradually add the remainder of the milk, constantly stirring. Add the parmesan and mozzarella cheese and slowly cook while stirring until the sauce thickens.  Do not let boil. Remove onion and bay leaf from sauce. Stir in paprika, taste, and add salt and pepper to taste.

Add cheese sauce to the pasta and mushroom mixture, and stir.  Spread in casserole dish,  sprinkle grated cheddar cheese over top, cover with tin foil and bake at 350 F for 30 minutes.   Remove tin foil and put back in oven for another 10 minutes or until the top is golden.   

Note:  I sometimes add chopped bacon, crisply fried, to the vegetable mixture if there are no vegetarians in the crowd.  


Wednesday, November 7, 2012

Festive Pomegranate Quinoa Salad

Every year the United Way Committee at my office hosts a potluck fundraiser lunch. The pomegranate quinoa salad I contributed this year was a big hit and I promised to share the recipe, so here it is.  

Pomegranate Quinoa Salad
  • 2 cups of quinoa
  • 4 cups of water
  • 1 preserved lemon*
  • 2 garlic cloves, finely chopped
  • 2 stalks of celery finely chopped
  • 1/2 cup of olive oil
  • 1/3 cup of sherry vinegar
  • seeds from one large pomegranate
  • 1 bunch of cilantro finely chopped
  • salt to taste
Rinse quinoa well.  Combine water and quinoa in pot and bring to boil, turn temperature down, cover and simmer for 10 minutes. Remove from stove and place in bowl.  Add olive oil, sherry vinegar and garlic to hot quinoa. Rinse the preserved lemon, remove pulp, and finely chop.  Add to quinoa mixture and stir. Set aside to cool to room temperature.  Finely chop celery, and place on top of room temperature quinoa along with pomegranate seeds and cilantro.  Gently stir just before serving. Serve at room temperature. 

*Because preserved lemons are hard to find, I make my own.  They are remarkable easy to make and an ingredient that adds an interesting freshness to a dish.  An earlier entry details the process.  

Wednesday, October 31, 2012

My Family's Favourite Apple Pie

Growing up, it was my responsibility to make the apple pie for Thanksgiving and Christmas dinners.  I have a vague recollection of this pie evolving from something my father's mother would make for us.  My grandmother was French Canadian, but lived in Kitchener when I was growing up.  I remember visiting her in the summer for a week at a time and travelling up and down country roads to visit different Mennonite farms, buying apples from one farm, a chicken from another, butter and eggs from from somewhere else.  It was on one of these summer visits that we made a version of this apple pie together.  The pie has evolved over the years, and is now less sweet.  

My siblings still expect me to make this apple pie for family events, to the point that when my daughter and I were out of town for Christmas last year, I think my family seemed to miss the pie, or at least the topping more than us.  


My Family's Favorite Apple Pie

Pastry for a Single Crust


  • 11/4 cups of pastry flour
  • 1 tablespoon of sugar
  • 1/2 cup of cold unsalted butter
  • 1tablespoon of lemon juice 
  • 3 tablespoons of cold water
Sift flour and sugar into a bowl, cut butter into small squares and cool again in the fridge.  Add to flour and cut into flour.   Mix lemon juice and water together.  Sprinkle half of water over over flour mixture and gently mix with fork, continue to add fluid until the the mixture holds together.  Do not over work. Form into ball and wrap with plastic.  Let rest in refrigerator for at least a half hour.  Roll out and fit into 9 inch glass pie plate.  

Apple Filling


  • 6-8 cooking apples, I like Spy or Cortland
  • 1 tablespoon of cinnamon
  • 1 teaspoon of nutmeg
Peel apples and cut into large chunks and place in bowl.  Mix with cinnamon and nutmeg.  Some people add sugar, I prefer the pie to be a bit tart as a counterbalance to the sweetness of the topping. Arrange apples in pie plate fitting as snugly as possible to minimize settling.  

Topping


  • 1/2 cup butter
  • 1/2 cup brown sugar
  • 1 tsp cinnamon
  • 1/2 cup flour
Mix dry ingredients together in bowl.  Cut butter into small pieces and work into dry ingredients with fingers. Handle  as little as possible.  Gently pat chunks of the mixture into flattish pieces, that are not too perfect and place on top of pie, gradually covering the top of the pie. 

Place pie in 375 degree preheated oven and then turn oven down to 350 and cook for 25 to 30 minutes. Remove and let cool. top should be crisp and apples should not be mushy.    

Friday, October 26, 2012

Thanksgiving Squash with a Moroccan Twist by Andrea

Last weekend, Andrea and friends were visiting and because I had a number of squash from the garden sitting on the counter, Andrea decided to make a variation on the squash dish she made for  her family's Thanksgiving dinner.  It was a fabulous combination of sweet and savoury.

 Thanksgiving Squash with Moroccan Twist                            photo by Mark

1 winter squash
1 tsp of smoked paprika
12 walnuts
8 medjool dates pitted and coarsely chopped
1 tablespoon  of olive oil
salt and pepper to taste

Cut squash in half and clean and remove seeds.  Divide halves into wedges and paint with olive oil.  Lightly sprinkle smoked paprika and bake place on baking sheet.  Put in preheated oven 350F, and bake for about 15 minute s depending on size of squash, until it begins to soften up, but still has some bite.  If it were pasta, I would say al denté.  Do not over cook.  Remove from oven and scoop squash out of skin and into bowl.

While the squash is baking, spread walnuts on baking sheet.  Place in oven and toast.  Watch carefully, and remove when they begin to brown.  Should take about 3 or 4 minutes.  Be careful not to burn.  Coarsely chop and set aside.

Toss dates, walnuts and squash together and serve.

Tuesday, October 16, 2012

Heritage Green Zebra Tomato and Yellow Tomato Soup

Green Zebra Tomatoes on the Vine
One of my favourite tomatoes is the green zebra tomato.  I love the texture combined with the fabulous colour and sweet flavour, with very little acidity.  Last spring I planted a few more zebra tomato plants than necessary and somehow forgot to plant your basic red tomato.  I did, however, plant heritage pineapple tomatoes which were fabulous, and are now included in my list of favourite tomatoes.  With the risk of frost, I picked the last of my green zebra tomatoes and yellow tomatoes and so made this soup. Next time I think I will not mix the yellow and the green so that the colour is cleaner. this soup tasted good hot, and then even better, cold the next day.  
Zebra Tomato and Yellow Tomato Soup with slice of Pineapple Tomato  
  • 4 green zebra tomatoes
  • 2 yellow low acid tomatoes
  • 1 onion
  • 1 clove of garlic
  • sprig of thyme 
  • 1/2 cup of white wine
  • 1/2 cup of broth, chiken or vegetable
  • 2 tablespoons of sugar
  • 1 tablespoon of white balsamic vinegar
  • 2 tablespoons of olive oil
  • salt and pepper
Chop onions and and sauté in olive oil until soft in large acid resistant pot.  Add chopped garlic and sauté.  Chop tomatoes and add to onion mixture.  Add broth and wine, and thyme. Add balsamic vinegar, bring to boil, and reduce heat to simmer and cook until tomatoes are soft.  Taste, and add sugar  salt and pepper as required.  Works well as a hot or cold soup.  

Thursday, October 4, 2012

Curried Apple and Roasted Butternut Squash Soup


I planted butternut squash in my garden  for the first time this summer and now have lots of squash to make soup.  Years ago, my sister, MJ introduced me to curried squash soup.  She had dropped in after visiting a friend, and raved about a soup her friend had made.  We experimented and came up with something similar.

I have a number of renegade apple trees in the country, and over the years have added apples to the soup in the fall.  This past weekend I decided to also use some of the last vegetables of the year from my garden - leeks, a hot pepper, shallots I had forgotten about that were hiding under some of the beans,  and of course the butternut squash.

Curried Apple and Roasted Butternut Squash Soup
  • 1 butternut squash
  • 1/4 cup of maple syrup
  • 2 leeks
  • 2 shallots
  • 1 chili pepper
  • 2 apples
  • 2 cups of chicken stock
  • 2 sprigs of thyme
  • 1 bay leaf
  • cinnamon
  • red curry paste
  • Salish salt
  • pepper
  • 1 can of coconut milk
  • yogurt for garnish
Cut butternut squash in half and clean out seeds. Sprinkle with cinnamon and paint exposed flesh wiht maple syrup, leaving the remainder in hollow.  Place on baking sheet and bake in oven at 350F  for half an hour or until soft.

While the squash is roasting, cut and clean leeks, and saute in olive oil in heavy pot.  Add cut shallots and chopped chilli pepper with seeds removed.  Set aside.  Peel apples and chop and add to leek mixture.  Add chicken stock, one of the sprigs of thyme, and the bay leaf.

Remove squash from oven and scoop out cooked pulp, adding to onion and stock mixture. Add curry paste and stir.  Bring to boil and simmer for 20 minutes. Remove bay leaf and and thyme stem.

Blend mixture with immersion blender until smooth.  Stir in coconut milk and taste.  Add salt and pepper to taste.  and stir in leaves  from last sprig of thyme.  


I the mean time, clean the leeks well 

Rose's Fabulous Frozen Vanalla Yorgut

I am visiting Ian and family for dinner and Rose, who is now 10, is making ice cream again.  This time she is making, a special request - her fabulous frozen vanilla yogurt which she made for me for the first time last winter.  It was absolutely amazing and like nothing you can buy in the store. 


Rose's Fabulous Frozen Vanilla Yogurt,   photo by Rose
  • 3 cups Greek yogurt
  • 3/4 cup of sugar
  • 1 tsp of pure vanilla extract (the good stuff)
  • the seeds from 2 vanilla pods
Mix all of the ingredients together and put in ice cream machine for 30 minutes.  Eat soft or put in freezer to harden. This recipe is all about the quality of the ingredients.